Friday, January 31, 2025

Beginning Stamping - Card Making Introduction Video

If you are a beginner stamper / card maker, this series will be perfect for you to learn all the ins and outs, the do's, the don’ts, the needs, and the wants.  But if you are an experienced stamper / card maker, you might even learn a few tips or tricks as I go along. I can’t believe how much I’ve already learned in the past few days while I gathered information to start the series of videos. Follow me on this new series of videos, as I introduce Card Making and Stamping to you. 


Introduction Video 


Follow Me On YouTube


Email: dharmon893@gmail.com


Thursday, January 30, 2025

Notepad Covers - Crafts Miscellaneous

 This is such a cute little project. It would be a great Valentine Gift for your favorite teacher, a gift for a co-worker, and or a Christmas gift as well.  


SUPPLIES

Sweet Sorbet Cardstock - I# 159268
Cut 2 base pieces - 4 1/2 x 6 1/2 
Cover - 4 x 7 3/4 - Score at 6 and 6 1/4

Daffodil Delight Cardstock - I# 119683
Front & Inside Layer - 2 Pieces - 3 3/4 x 5 3/4 

DSP - Bee Mine - I# 162546
Front Panel - 3 1/2 x 5 1/2 

Chip Board 
Cut 4 1/2 x 6 1/2 

Basic White -I# 159276
Stamp the sentiment on a strip of basic white

Sweet Sorbet Classic Ink - I# 159216

Banners Pick a Punch - I# 153608 

Dimensionals - I# 104430

Adhesive Backed Hearts & Flowers - I# 162557

Adoring Hearts Stamp Set - I# 162563

STICKY NOTES - 4X6 
(STAPLES - AMAZON)

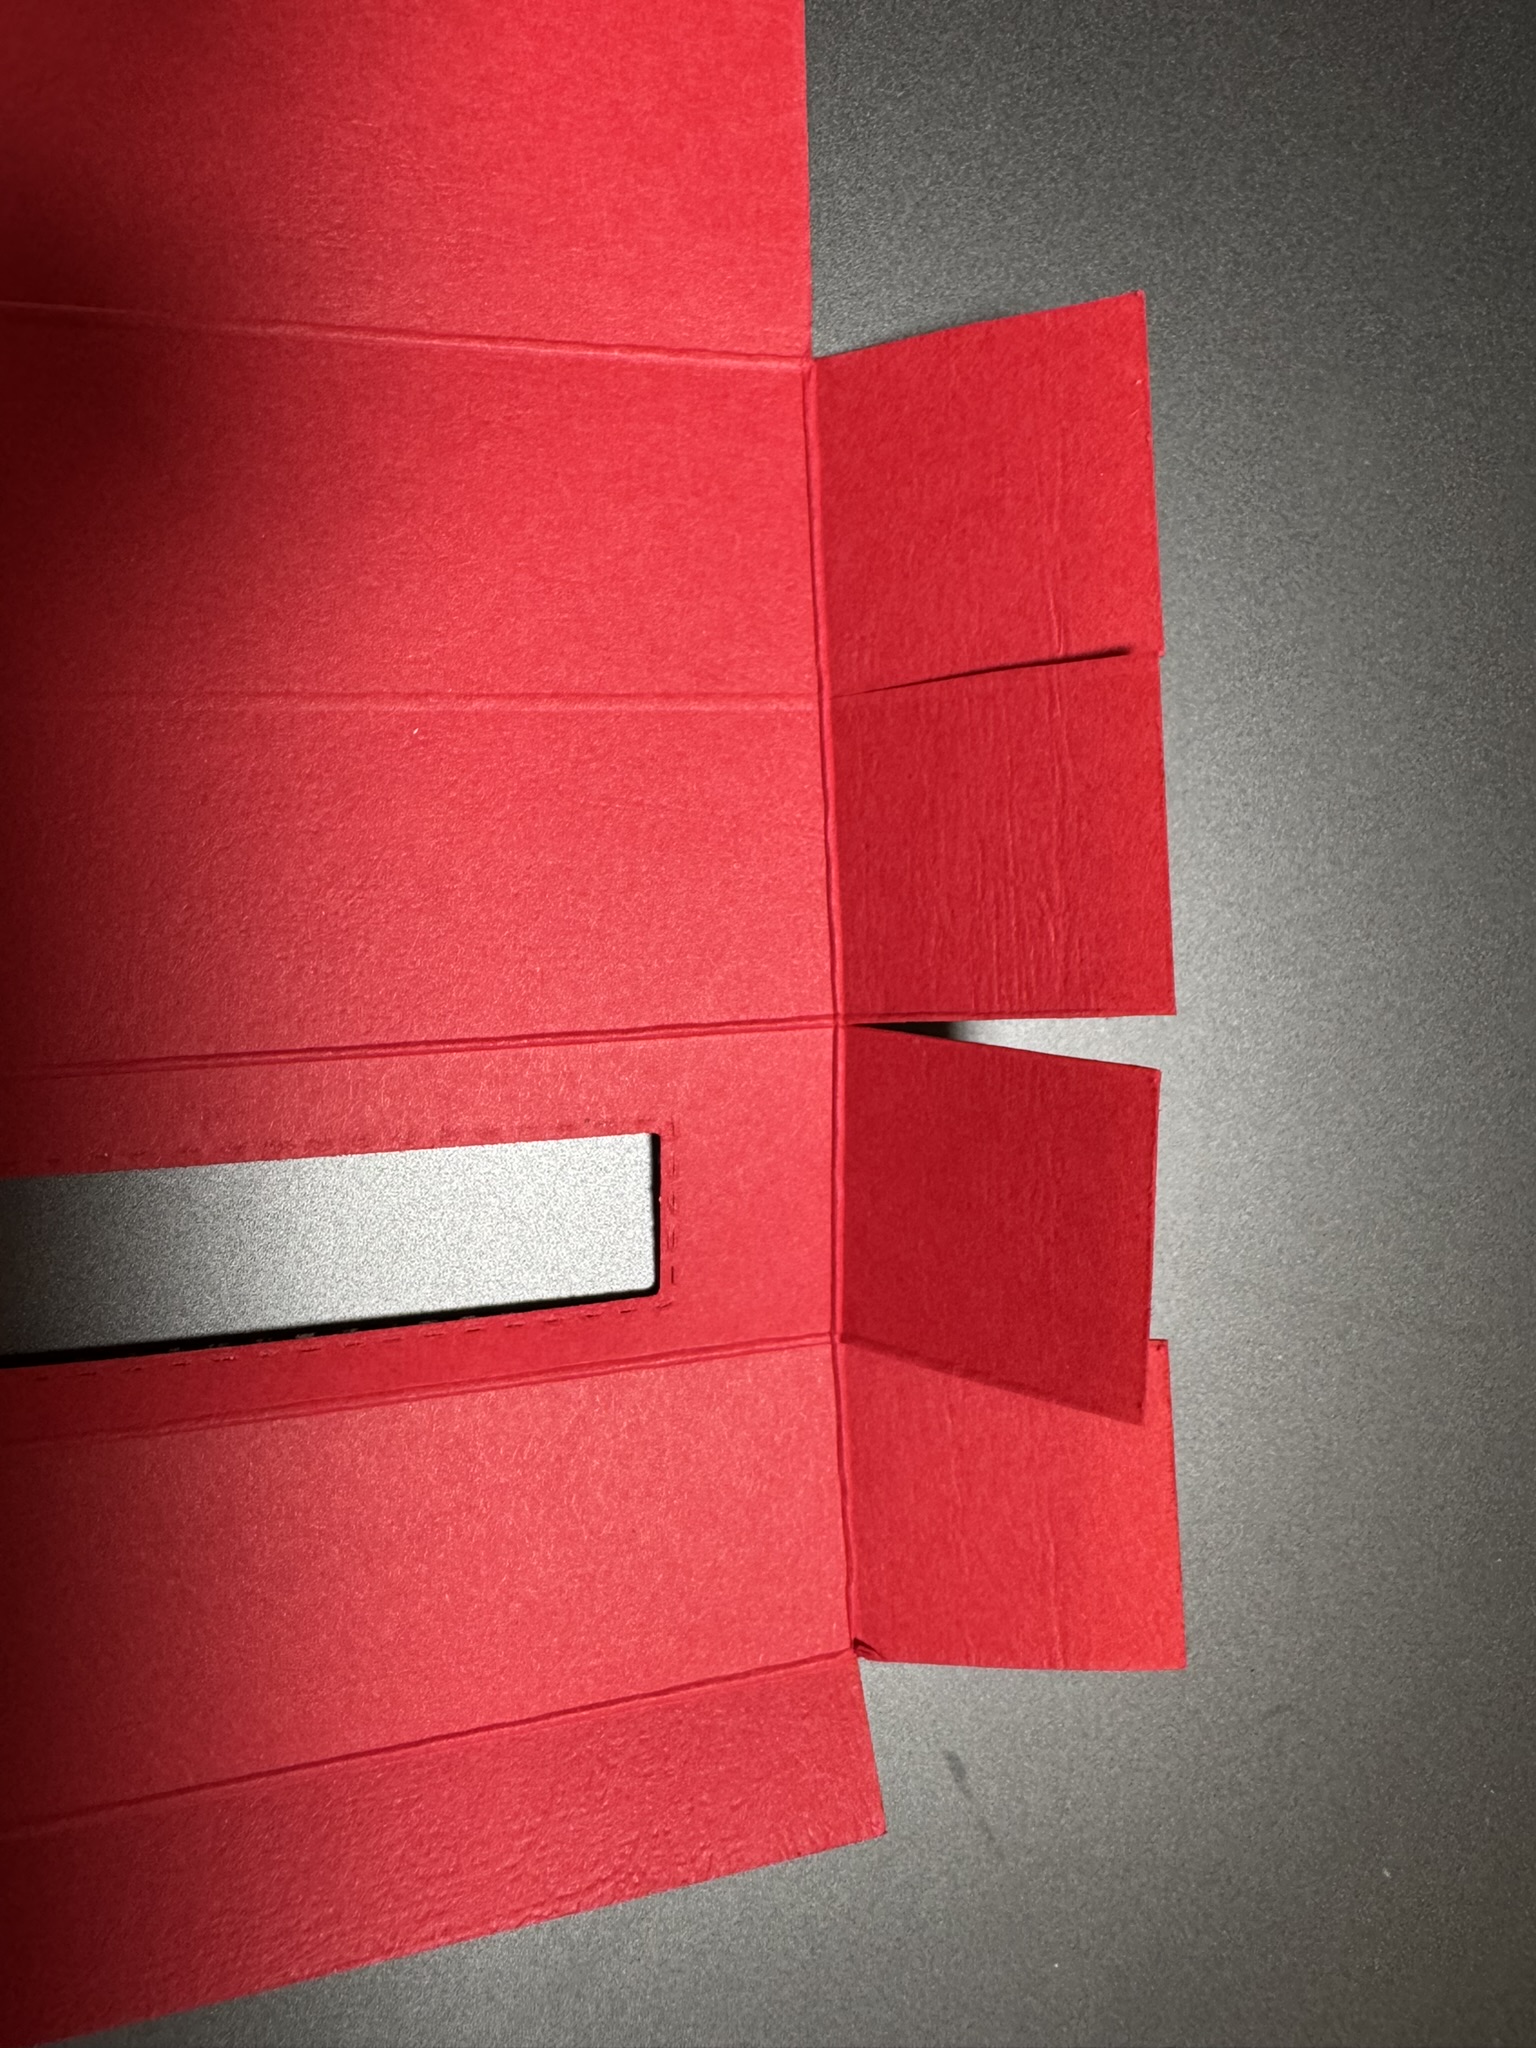
Adhere the Sweet Sorbet Base Pieces to the front and back of the chipboard using the Multipurpose Green Glue.
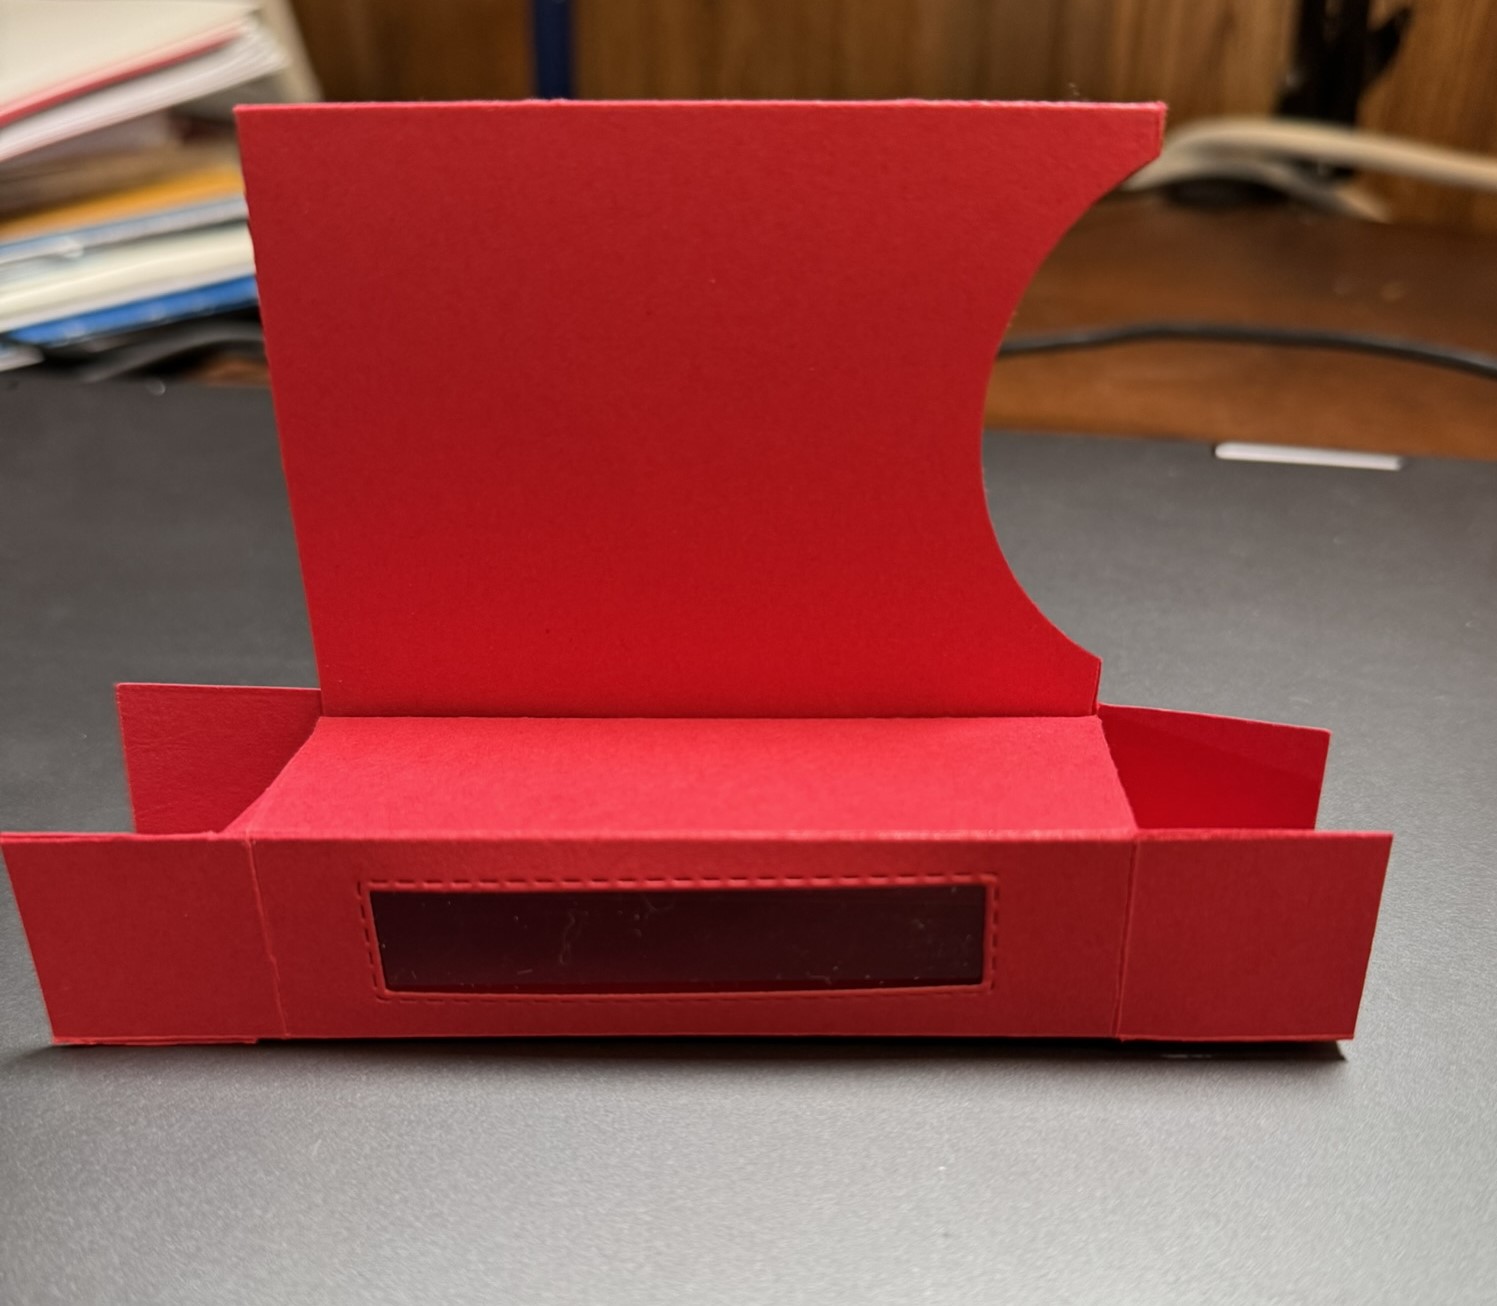
Position the Sweet Sorbet Cover piece over the Sticky Notepads and wrap the flap to the back of the pad. Adhere the pad to the center of the Chipboard base using tear & tape. 
Add the Daffodil Delight to the cover front with adhesive.
Adhere the Bee Mine DSP on top of the Daffodil Delight cover.
Stamp the Sentiment on Basic White and punch the ends with the Banners Pick a Punch.  Embellish the banner and adhere the banner to the front of the cover using dimensionals.

Inside Cover 
Adhere the Daffodil Delight to the inside top cover using adhesive. 
Stamp on and off the Basic White using the sweet Sorbet ink. 
Adhere the stamped basic white to the Daffodil Delight. 

These are so fun to make & I hope you enjoy it as much as I did.
Please reach out if I can be any help.

Wednesday, January 29, 2025

Craft Room Organization - Stampin Storage


 Ready to tackle another small but impactful step in organizing your craft space? Stamp n Storage has shared the Craft Room Organization - 16-Minute Sprint - Part #2. In this video, they show you how to dedicate just 16 minutes to cleaning up and reorganizing your Desk Caddy. This essential piece of your craft room is perfect for keeping your most-used supplies within arm’s reach, but it can quickly become cluttered.

They will guide you through simple steps to clean, declutter, and reorganize your Desk Caddy so it stays functional and tidy. With just a small daily time commitment, you can transform your craft space one area at a time.

Recipe Wednesday!! - Crock Pot Breakfast Casserole

 Recipe Time.... Crock Pot Breakfast Casserole

When I worked at Wilbur Ellis, and we worked on Saturday's I would try to make something for breakfast. This one was loved by all - you could eat it regular or easily throw it on to a tortilla. I'd make it the night before and unplug the crock pot and take in. Easy Peasy!!
Crock Pot Breakfast Casserole
2 cups frozen hashbrowns
1 lb - Breakfast sausage browned and drained
8 oz - Shredded Cheddar Cheese
10 Eggs ( Well this was really affordable a few years ago *lol*)
1/2 Cup Milk
2 oz Green Chilis - Chopped
2 TBLS Minced Onion
1/2 Tsp Salt
1/4 Tsp Pepper
Spray large crockpot with non-stick cooking spray. Place has browns onto the bottom. Layer on top 1/2 the cooked sausage and 1/2 the cheese. Repeat the layers. In large bowl, whisk together eggs, milk, green chilis, onion, salt and pepper. Drizzle over top of sausage and cheese layers. Cook on low for 6-7 hours or until the eggs are set. Serve with salsa, sour cream , tortillas or eat plain. Serves 6-8 people


Tuesday, January 28, 2025

Scrapbook Page - Basketball Layout

 I absolutely love watching and documenting my grandkids sports. I loved how this two-page layout turned out. I was able to incorporate my Stampin' UP products in with products I had collected over the years to complete it.


Stampin Up Products

Basic Black Cardstock - I # 121045

Tuxedo Black Momento Ink - I #132708

Linen Thread - I# 104199

Baker's Twine Essential - I# 155475

Blending Brushes - I# 153611

Merriest Trees Dies - I# 162047

Mini Cut & Emboss - I# 150673

Paper Trimmer - I# 152392


Monday, January 27, 2025

Craft Room Organization - Stampin Storage

 I absolutely love the products from Stampin Storage.  Cleaning and organizing your craft space can be so overwhelming.  Today they shared a video on Craft Room Organization in 16-minute sprints.  Hopefully this will be the motivation and help you needed.  I know I can sure use it. 


Craft Room Organization - 16 Minute Sprints Part 1 - Stamp-n-Storage

Thursday, January 23, 2025

Gift Card Holder / Treat Box - Valentine

 You guys... This is so stinking cute and so fun to make. Spoiler Alert - I'm making these for the littles for Valentines. You wouldn't have to make the gift card holder and just use as a base that way you could use as a great treat for a class from a teacher, from a child to their class, for birthday party favors. And can you imagine all the different ways to dress it up for other holidays!!!

Love, Love, love.


Here is the list of supplies you will need:

Supplies

Real Red Cardstock - I# 102482
Cut 5 1/2 x 9 3/4
On the 9 3/4 side - Score at - 2 3/4, 5 1/4, 6 1/4, 7 1/4, 8 1/4, 9 1/4 inches
On the 5 1/2 side - Score at 1 and 4 1/2 inches

Window Sheet - I # 142314
Cut at 3/4 X 3 1/4 inches

Bee My Valentine Stamp Set - I# 162547 

Gnome Dies - I# 159625

Be Mine DSP - Gnome Hat - I# 162546

                                       Basic White Cardstock - I# 159276

                                                Cream Colored Cardstock  
                                        (I used Bazzil in my personal stash) 
   
                                          Basic Black Cardstock - I# 121045

  Real Red Classic Ink- I#147084

Stitched Rectangle Dies - I # 151820


DIRECTIONS :

1. Fold on all of the score lines. Cut off the two long skinny rectangular areas on each side, and the two small rectangles on each side, keep the four squares on each side. 

2. Cut on each square cut on the score line up to the intersecting score line and stop.


3. Using the long narrow Stitched Rectangle Die, cut a window in the 2nd panel (or, if you count the
bottom tab, the 3rd panel). 


4. Place a Mini Glue Dot on each end of the Window Sheet, place it in the window opening.

5. Remove the Tear & Tape backing and fold the two larger panels together to form the pocket for the gift card. With the 1 1/2" Circle Punch, punch out a finger notch through both pieces of cardstock.
Hershey Kiss Gift Box and
Gift Card Holder


6. Put tear and tape on the tab end - peel off backing, fold over and attach
to the back of the card. 


6. Place a piece of tear and tape on one square at one end. Pull the backing off, fold in all the squares with the Tear & Tape one last. Do not glue the other end.

7. Fold in the open ends of the box and adhere with tear and tape or adhesive.


Wednesday, January 22, 2025

RECIPE - RAVIOLI WITH TOMATOES, ASPARAGUS, GARLIC & HERBS

This recipe is absolutely amazing.   I love pasta but what I love about this recipe is that it's light, it's not heavy in sauce.  Also, because I don't know my Ravioli from Tortellini. I bought Buitoni Spinach & Ricotta Tortelloni .. AMAZING!!!


 Ravioli with tomatoes, asparagus, garlic and herbs

Ingredients:
1 tablespoon of olive oil
1 pound of asparagus, trimmed tips, cut into 2-inch pieces
2 cups of cherry tomatoes, halfway through
3 cloves of garlic, chopped
Salt and pepper to taste
1/4 cup of chicken broth
1 tablespoon of lemon juice
1/4 cup of fresh, chopped basil
1/4 cup of fresh, chopped parsley
1/4 cup of grated Parmesan cheese, more to serve
1 pack of ravioli with refrigerated cheese (20 ounces)
Addresses:
Cook the ravioli according to the instructions on the package. Drain and set aside.
In a large pan, heat the olive oil to medium-high heat. Add the asparagus and cook for 4-5 minutes until tender-crisp.
Add the cherry tomatoes and garlic to the pan. Salt and pepper seasoning. Cook another 2-3 minutes until the tomatoes begin to soften.
Pour the chicken broth and lemon juice. Bring it on low heat and cook for 2 minutes.
Add the cooked ravioli to the pan and throw it gently to combine with the vegetables and the sauce.
Stir fresh basil, parsley and grated Parmesan cheese. Cook another 1-2 minutes until everything heats up.
Serve the hot ravioli, covered with additional Parmesan cheese if you want.
Preparation time: 10 minutes | Cooking time: 15 minutes | Total time: 25 minutes
Kcal: 350 kcal | Portions: 4 portions


All reactions:
Judi DuGuay and 1K others

Tuesday, January 21, 2025

Scrapbook Page - Christmas Concert Layout

 This past weekend I was able to spend some time Scrapbooking. This is one of the pages I made for a Christmas Concert Layout.


Supplies

Cream and Striped Paper
(Photo Play - Candy Cane Paper- Scrapbook.com)

Cream Card Stock
(Bazzil)

Hearth & Holiday Enamel Dots
(Simple Stories) - 3 Craft Chicks


Reindeer Fun - I# 164167
( Stampin' Up)

Cherry Cobbler Classic Stampin' Pad
( Stampin' UP)


If you are bored watch the video here *lol*

Monday, January 20, 2025

Valentine Craft

 Here's a cute yet simple Valentine craft. Great for decor or a gift.

Get a large and smaller wooden heart from Hobby Lobby, Michaels, Craft or Dollar Tree or online.
Paint the colors you prefer.
Add twine, raffia or ribbon to enhance it however you like. You could also get miniature ones and make them for a tier tray!!!
I found this [Kraft's from Your Heart] Facebook post!!

Monday, January 13, 2025

PAPER PUMPKIN - JANUARY 11- FEBRUARY 10TH, 2025

 Sneak Peak of the February Paper Pumpkin Kit along with the coordinating dies. This kit is available to order thru February 10th. If you like the excitement of monthly subscriptions and don't want to have to purchase anything extra, this kit is for you!!


Coordinating Die Set 


Wednesday, January 8, 2025

Mini Desk Calendar

 This was so fun to make.. It would make a great teacher's gift for the new year. I used some of the new products out of the Mini Catalog.


SUPPLIES

Peach Pie Cardstock - I#163799
Cut - 8 1/4 x 3 3/4
Scored - 3,6, 7, 8 Inches

Bloom Impressions DSP - I#164944
(Part of the Sale-A-Bration)
Cut 3 3/8 x 2 5/8

Mini Calendar - Dowloaded off of Etsy
Amazon carries them as well

Pumpkin Pie Cardstock - I# 105117
Flower - Sentimental Park Dies - # 160566 (Older Catalog)
Party Dots - #164602

Order Here: Stampin' Up!

Watch Here:


Tuesday, January 7, 2025

New Mini Catalog January - April 2025

 Today is the day!!! The 2025 Spring Mini Catalog launches as well as the Sale-a-Bration event AND additional online exclusives!! It doesn't get much better than that!!!

Hop on over and take a peek. Start 2025 off and get your craftin' on!!!


FUN FOLD - POCKET FOLD - BLOOM IMPRESSION DSP

  I struggle sometimes putting colors together.  Even though the DSP says they belong together, I will question it in my mind.  I questioned...